Dental Photography in 2025: The Ultimate Beginner’s Guide for Dentists

Dental photography is often a neglected skill—something many want to learn but often overlook, thinking it’s a waste of time. There are also many who want to learn but simply can’t due to time constraints. Some understand its importance and how it can transform their dental practice, yet still neglect it, while others know nothing about it at all.
But did you know that dental photography today can be a real boon for your practice? It can increase your patient footfall and give you the confidence and motivation needed for the coming years of your career, whether it’s for the work you do or simply to reflect on. In this blog, we’ll give you a brief overview of what’s required for good dental photography and the basic settings you should use in your daily practice.
Advantages of dental photography:
Documentation and Treatment Planning
The photographs taken of the operative site serve as documented records for post-operative comparisons and help in tracking progress. This also facilitates timely or immediate intervention during treatment procedures. The documented images aid in diagnosis, monitoring, and detailed evaluation of conditions that may not be visible with direct vision or using mouth mirrors. Smile simulations can also be created to plan appropriate treatment procedures.
Patient Education and Communication
Dental photography acts as a bridge for better communication and visual explanation of a patient’s current condition. It helps them understand their dental state, learn about available treatment options, and ask necessary questions before starting a procedure. Well-presented treatment options increase treatment acceptance and demonstrate dental expertise, helping build trust with patients.
Legal Documentation
With legal cases against dentists on the rise, documentation of dental procedures through photography serves as an important defense against malpractice lawsuits. While not all procedures can be photographed due to time or technical constraints, it is strongly recommended to document all surgical and aesthetic treatments as potential legal proof.
Every comprehensive or high-value treatment should be documented as a precaution against possible future disputes. Additionally, cases involving patients who appear suspicious or overly apprehensive about a clearly explained procedure should always be photographed. Such legal documentation is a significant advantage for dentists.
Professional Advertising and Marketing
Dental photography allows dentists to showcase their skills to potential patients. High-quality images and videos can be used in advertisements, on social media, and other platforms to promote their clinic, services, and expertise. These images also help motivate patients by presenting potential treatment outcomes they could achieve through similar procedures.
Dental photography Essentials/Armamentarium:
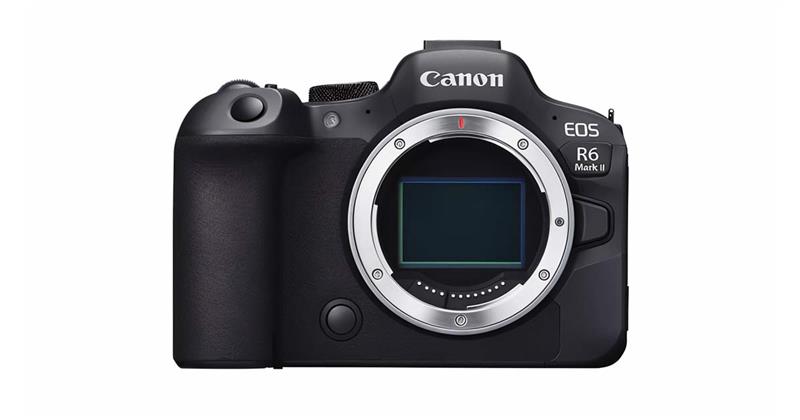
Camera Body
A perfect camera doesn’t exist, especially with rapid advancements in technology and ever-evolving features. Choosing the best camera can often be overwhelming. For dental photography, a professional-grade camera — namely a Digital Single-Lens Reflex (DSLR) or mirrorless camera—is essential.
It is recommended to invest in a camera with a large sensor, excellent low-light performance, and the ability to shoot in RAW format for maximum image quality and editing flexibility. Additionally, spending on a high-quality flash and lens is advisable to enhance the overall photographic output.
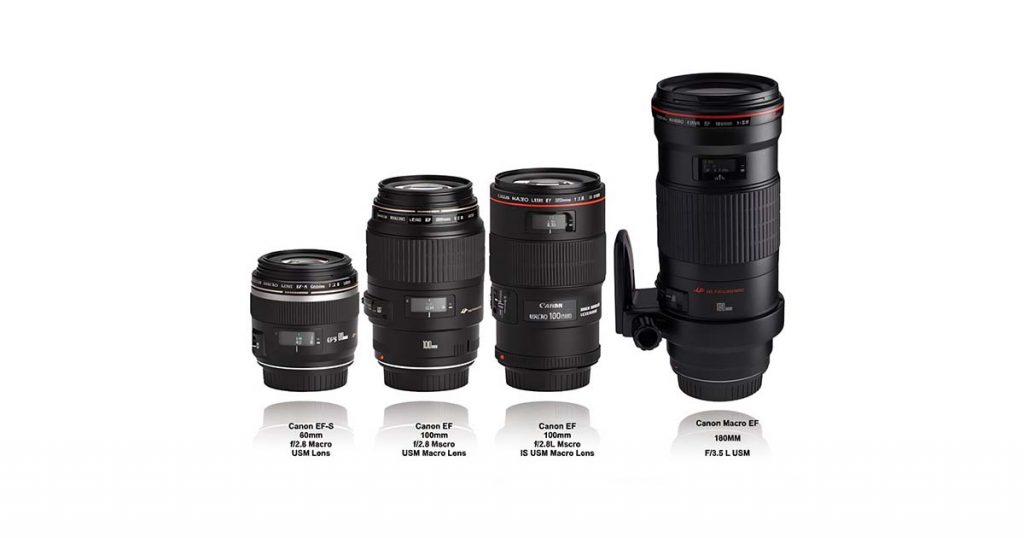
Macro Lens:
Dental photography requires high-resolution, detail-rich images, which are made possible through a macro lens. These lenses allow close-up, sharply focused shots thanks to their larger diaphragms, enabling higher magnification compared to standard (or amateur) camera lenses.
A macro lens with a focal length between 85–105 mm and a 1:1 magnification ratio is generally recommended. This means an object that measures 1 cm in real life will appear as 1 cm on the camera sensor — perfect for detailed clinical images.
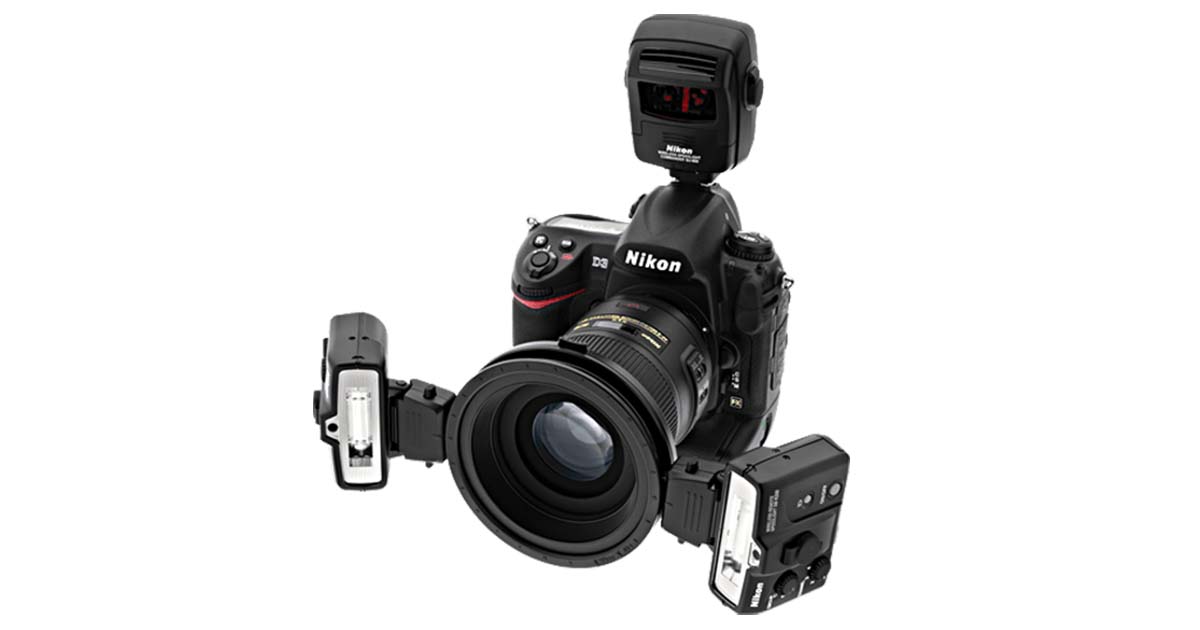
Light:
Proper lighting is mandatory to get the best photographs. Two types of flashes are commonly used- ring and twin flashlights.
The ring light encircles the lens, and the whole object is well lit, but a flat image is obtained.
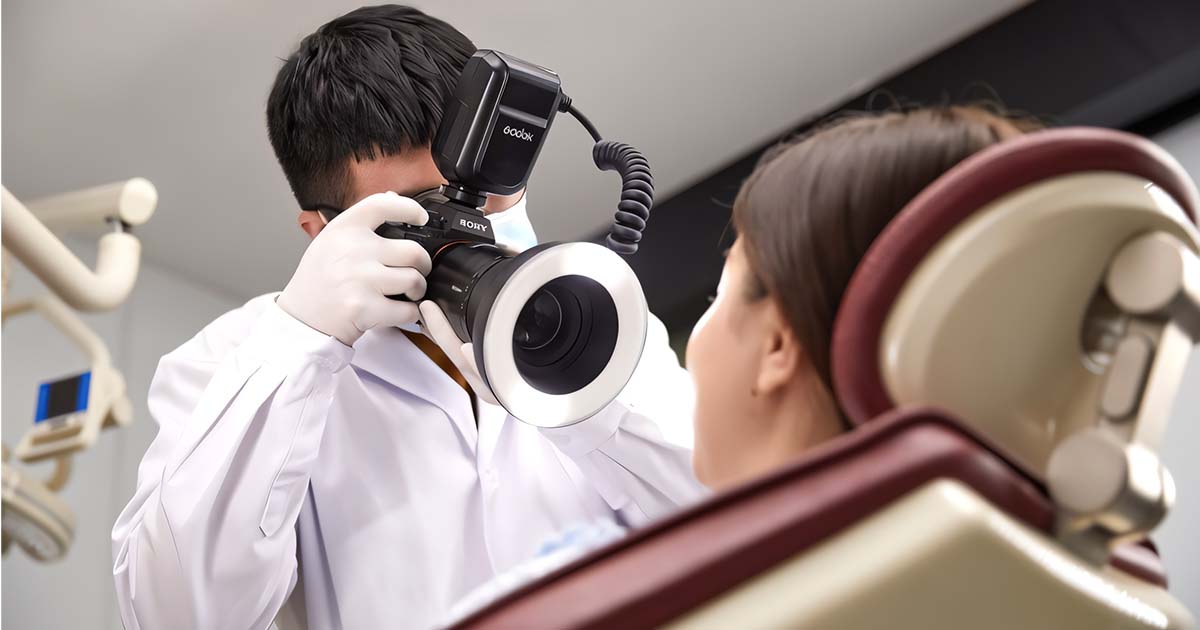
The other option is that of twin flashes, which are positioned on either side of the lens. It creates an image with less light harshness and more depth.
However, both options reduce glare and reflection on the teeth. It depends on the dental professional and their expertise and skills to decide which lighting setup gives the best results.
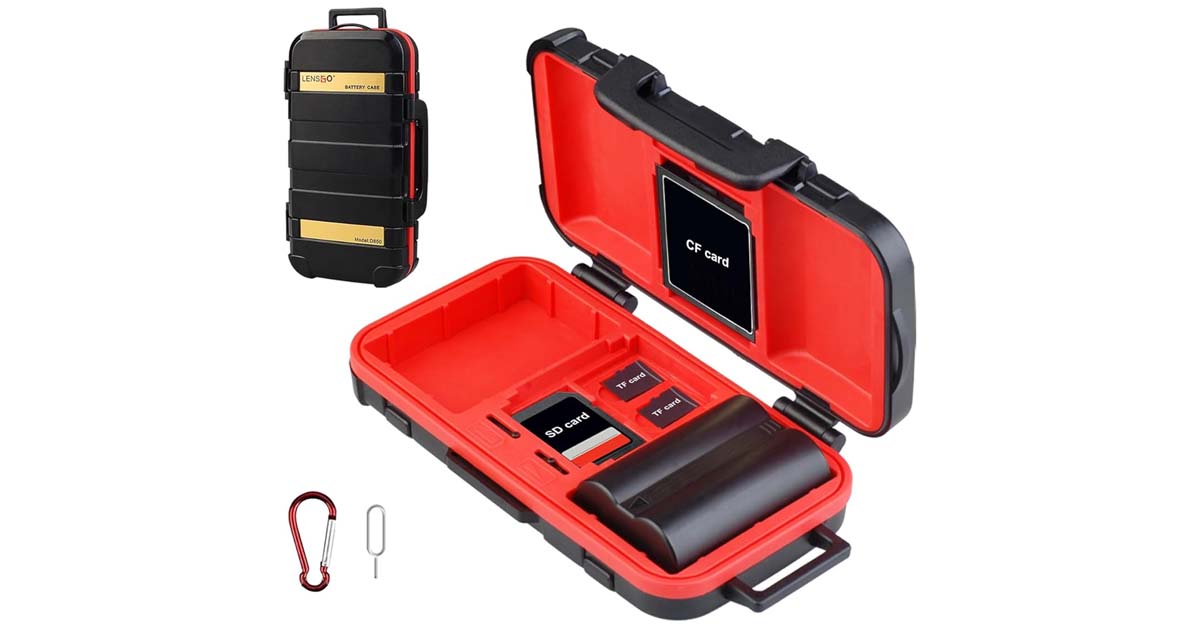
Other Camera Accessories:
Other Camera Accessories: Other important camera accessories include a memory card for adequate data storage, and a filter, which not only protects the lens but also helps in adjusting lighting conditions. Extra batteries are essential to ensure that the camera doesn’t run out of power during a dental shoot. Lastly, camera bags are necessary to store and protect all components safely and effectively.
Read Also: Intraoral Scanners:- Applications, Benefits, Characteristics
Retractors, mirrors, and contrasters:
All of these are essential as they help in isolating the area to be photographed and in eliminating any surrounding distractions.
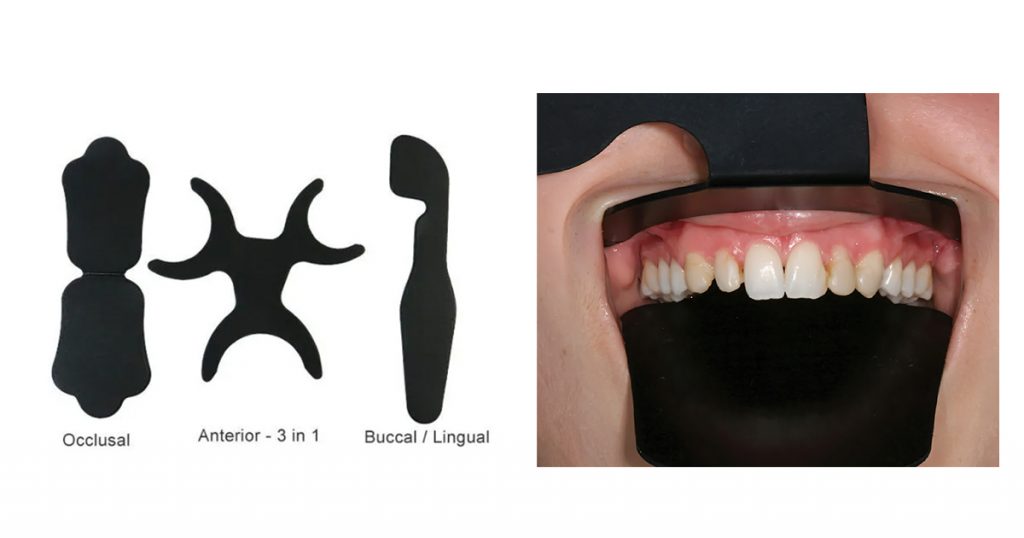
Cheek Retractors
Used for retracting the lips, labial, and buccal mucosa to improve visibility and allow maximum light on the area to be captured. These are available in plastic or metal and can either be single or double-ended. Other than that, these are also available in different sizes — small, medium, or large — and can be used according to a patient’s oral cavity size.

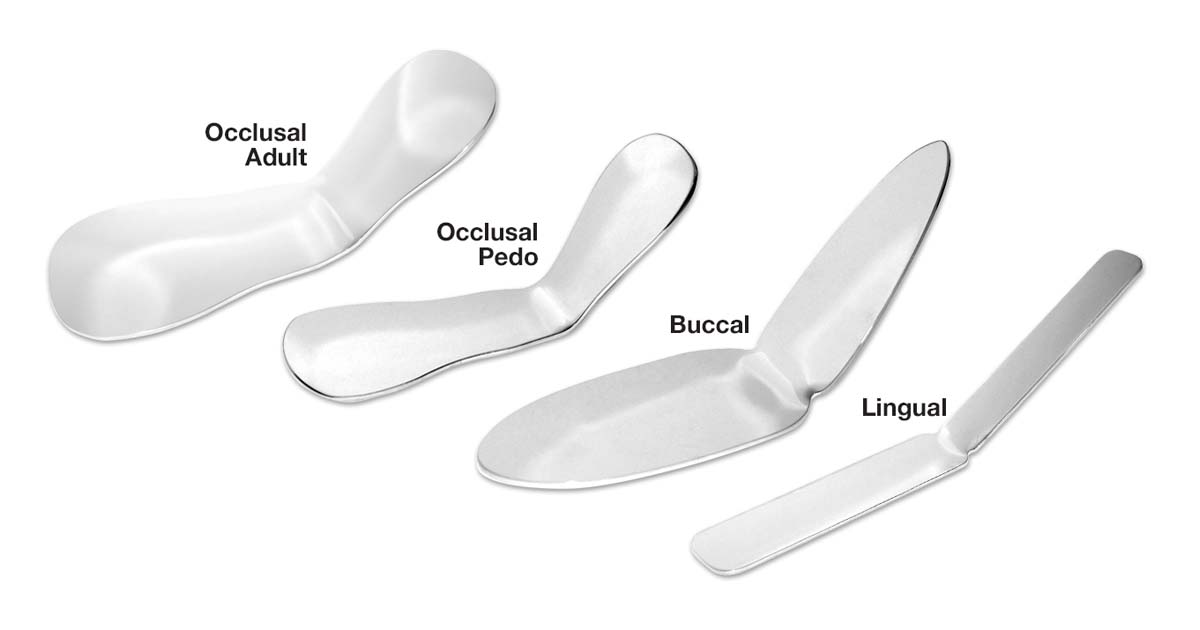
Intraoral Mirrors
Used to capture images of areas that are difficult to access or view directly, such as occlusal and buccal surfaces. These mirrors are long-handled, front-coated, and often come in different shapes and sizes that can be used for a designated area. Their use helps minimize the possibility of fingers being shown in the images when compared to the traditional intraoral mirrors.
Read Also: Intraoral Cameras in Dentistry: Revolutionizing Diagnosis and Care
The different mirrors are — occlusal mirrors with handles, bullet-shaped mirrors for buccal retracted views, and lingual cut mirrors for posterior sextants amongst many others. Additionally, it is recommended to warm the mirrors in a water bath or simply blow air onto the mirror surface from a distance while taking a photo with a three-way syringe.
Contraster:
These are usually made of black silicone or metal and are placed behind the required areas to create a dark background, making the area that is to be captured stand out.
Basics of Dental Photography Settings:
- Shutter speed: This is the measured time between the opening and closing of the camera shutter. A fast shutter speed is needed to freeze action, while a slow shutter speed will cause motion blur. For example, a shutter speed of 1/60 s allows half the light compared to its preceding 1/30 s but twice the light compared to the succeeding 1/125 s.
- F-stop number / Aperture: This refers to the size of the hole that lets light into the camera and is denoted by the f-stop number. A smaller f number means a wider aperture, and vice versa. A wide aperture allows more exposure but gives a narrow area of focus. Conversely, a larger f-stop number means a smaller aperture and greater depth of field, resulting in more overall focus on the image.
- Exposure / ISO: This is the amount of light allowed to pass through the lens to reach the sensor. Longer exposure is needed in low-light areas, whereas a brief exposure works well in well-lit conditions to produce a sharp image. The ideal ISO range for intraoral and extraoral images is between 100 and 200. The duration of exposure to light is controlled by the shutter speed.
- Framing and Composition: Effective composition enhances an image’s clarity and visual appeal. Positioning the subject along grid lines helps create balanced images with all areas proportionately covered. Avoid cropping into the subject area and try to remove blank or negative spaces within the frame wherever possible.
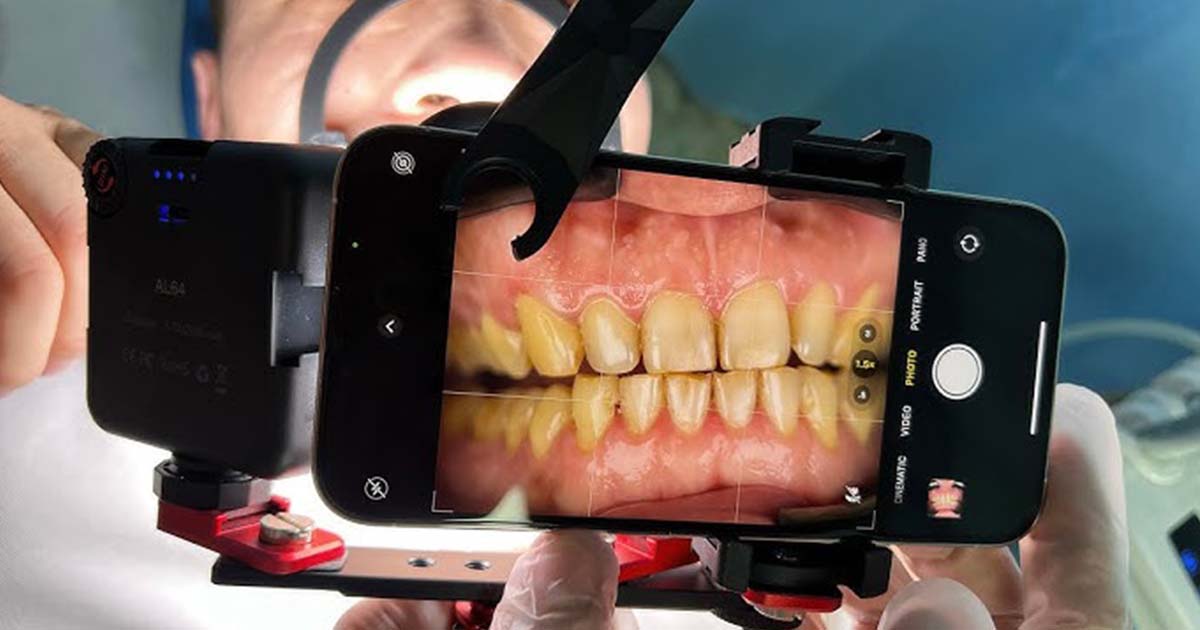
Smartphone Dental Photography:
With good, high-quality cameras in smartphones these days, dental photography using a smartphone is often easier and less time-consuming. However, the pictures captured are not as good as those taken by professional cameras and generally provide only a standard output, often requiring further image enhancement, color correction, or other editing.
The smartphone lens typically lacks the necessary focal length and does not match the capabilities of macro photography. These cameras often wash out surface textures of enamel or ceramic prostheses. That said, with the various flashlights available in the market, smartphones can produce decent images to some extent — especially when the budget doesn’t allow for a professional camera.
Following are some basic steps you can follow to get a decent dental photograph, whether intraoral or extraoral:
Intraoral photography with a smartphone:
- Retract the lips and buccal mucosa.
- Disinfect the phone and angle it at 45 degrees.
- Use the chair light or ring light positioned about 90 degrees from the operative site to be captured or use the smartphone flashlight.
- Focus on the area of interest or use the lock-focus option if your smartphone has it.
- Try to cut out any negative space that might be captured in the photo.
Extraoral photography with a smartphone:
- Ask the patient to smile naturally or maintain a naturally rested facial expression. Use the grid option to capture facial features symmetrically.
- Center the nose in the image.
- Use a white or black background.
- Position the patient about 50 to 60 cm in front of or above the fundus to reduce shadows.
- Place the camera at the patient’s eye level and try to cut out any unnecessary space in the frame.
Conclusion
Dental photography is a valuable skill that can greatly enhance your clinical practice, patient communication, and professional reputation. Whether you use a professional camera or a smartphone, understanding the basics of equipment, settings, and techniques will help you capture high-quality images that serve multiple important purposes — from treatment planning and documentation to marketing and legal protection.
Investing time in learning and practicing dental photography is never wasted; it’s an investment in the growth and success of your practice. You can explore everything you need for dental photography on our website, Dentalkart, where we offer a wide range of accessories to help you get started and excel. Start incorporating dental photography into your routine today and see how it transforms not only your work but also your confidence and patient relationships.

No Comment